Objective-Cライブラリ管理ツールCocoaPodsを使い始めたのでインストールメモを書きます。
CocoaPodsインストール
gemでインストールします。
$ sudo gem install cocoapods
CocoaPodsをセットアップします。
$ pod setup
Setting up CocoaPods master repo
Setup completed (read-only access)
pod setupを実行すると~/.cocoapodsディレクトリ内でライブラリの管理を行うようにセットアップをします。
$ ll -a ~/.cocoapods/
total 0
drwxr-xr-x   3 suusuke  staff   102  5 20 10:48 .
drwxr-xr-x+ 51 suusuke  staff  1734  5 20 10:48 ..
drwxr-xr-x   3 suusuke  staff   102  5 20 10:48 repos
CocoaPodsを使ってみる
CocoaPodsSampleというサンプルプロジェクトを作って、AFNetworkingライブラリを使う想定で使ってみます。
サンプルプロジェクトの下に、Podfileという名前で管理するライブラリを記述していきます。
記述方法は、
開発レシピ:Objective-Cのライブラリ管理ツール CocoaPods | iOS開発者@日本.
に詳しく書いてあるので参考にしました。
$ cd ~/iPhone/CocoaPodsSample/
$ vi Podfile
platform :ios, "7.0"
pod 'AFNetworking'
pod installコマンドでライブラリをインストールします。
$ pod install
Analyzing dependencies
Downloading dependencies
Installing AFNetworking (2.2.4)
Generating Pods project
Integrating client project

[!] From now on use `CocoaPodsSample.xcworkspace`.
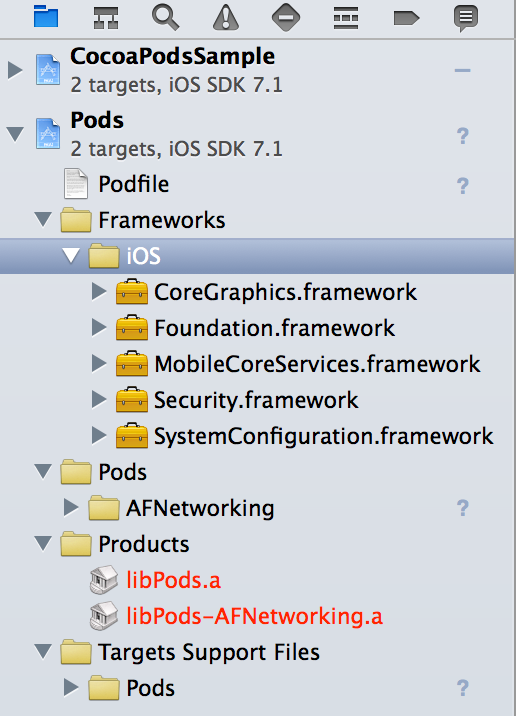
CocoaPodsSample.xcworkspaceという名前でワークスペースファイルができているので、開くとAFNetworkingライブラリが追加されています。