CakePHP

レガシーなシステムにCakePHPを使ってスマートフォンサイト作った時のメモ

zendで作られたWEBサイトのスマートフォン用を作ることになったのですが、zendでシステム化されているところは外注で作られた所らしく、
しかも暗号化されており、ソースコードも契約上もらえないという状況。
仕方がないので、既存の仕組みはそのままにしてCakePHPでスマートフォン版を作成する事にしました。
サーバー環境からPHP5.1なのでCakePHP1.3を使用しました。

目次

  • 基本
  • その他

基本

モデル

テーブルはCakePHPの命名規則には当てはまってないので、キーとテーブル名を指定して作成します。

class UserTbl extends AppModel {
    var $name = 'UserTbl';
    function __construct () {
        $id = array(
            'id'    => false,
            'table' => 'user_tbl',
        );

        parent::__construct($id);
        $this->primaryKey = 'user_id';
    }

}

また、複合キーを使ったテーブルもあるのでそこは諦めてSQL直書きで対応する事にしました。

class UserImageTbl extends AppModel {
    var $name = 'UserImageTbl';
    var $useTable = false; // 複合キーのため

    function findById($user_id, $image_id) {
        $sql = <<<SQL
SELECT
        *
    FROM
        user_image_tbl AS UserImageTbl
    WHERE
        user_image_user_id = ?
        AND
        user_image_id = ?
SQL;

        $userImage = $this->query($sql, array($user_id, $image_id));
        if (count($userImage) === 1) {
            return $userImage[0];
        }
        return $userImage;
    }
}

コントローラ

viewに渡すために$this->dataにモデルからとった値を設定します。

$profile = $this->UserProfileTbl->read(null, $id);
$this->data['ProfileBasic'] = $profile['UserProfileTbl'];

フォーム用モデル(バリデーションまで行う)とデータ登録用モデル(SQL発行)を別々に作成し、一つのフォームに一つのフォーム用モデル、
一つのテーブルに一つのデータ登録用モデル、という風に決めて作成しました。
取得後のキー名(テーブル名のキャメルケース)とフォームのキー名が違うので、フォームに渡す際や更新する際は都度設定する必要が有りましたが、その方がわかりやすいと思ったのでその様にしました。

ビュー

ヘルパーにモデル名とurlを指定して作成しました。

<?php echo $this->Form->create('Contact', array('url' => '/contact/', 'name' => 'contact-form'));?>

<?php echo $this->Form->text('Contact.mail', array('class' => 'w0')); ?>
<?php echo $this->Form->error('Contact.mail');?>

その他

ページング

複合キーの場合は、paginateも使用できないので自分で仕組みを作成する必要がありました。
ページングで必要な情報は、件数と表示するページの情報が最低限必要です。
件数はapp_model.phpに件数をFOUND_ROWS()を使って件数を返す関数を用意しました。

class AppModel extends Model {
    function found_rows () {
        $rows = $this->query('SELECT FOUND_ROWS();', false);
        if (!empty($rows)) {
            return $rows[0][0]['FOUND_ROWS()'];
        }
        return 0;
    }
}

あとは、検索用のSQLでSQL_CALC_FOUND_ROWSを指定すれば全件数は取得できます。

        $sql = <<<SQL
SELECT
        SQL_CALC_FOUND_ROWS
        *
    FROM
        {$tbl}
    WHERE
        {$where}
    ORDER BY {$order} DESC
    LIMIT    ?
    OFFSET   ?
SQL;

        $users = $this->query($sql, $param);
        $rows = $this->found_rows();
        $result = array();
        foreach ($users as $user) {
            $i = key(array_slice($user, 0, 1));
            $result[]['UserTbl'] = $user[$i];
        }
        return array($result, $rows);
    }

ページングのリンクは共通処理を行うコンポーネントを作成してリンクを生成するようにしました。

    /*----------------------------------------------------------
     検索結果共通処理(ページング)
     ----------------------------------------------------------*/
    function _setPagingLink ($query, $members, $all, $page, $type) {

        $this->set('query', $query);
        $this->set('members', $members);
        $this->set('all', $all);

        $maxpage = ceil($all / 10);

        // ページングリンク
        if ($page != 1) {
            $this->set('prev', '<a href="/s/search/'.$type.'/?page='.($page - 1).'&'.http_build_query($query).'">前へ</a>'."\n");
        }
        $start = ($page - 1) * 10;
        $end = $start + count($members);
        $this->set('counter', sprintf('%d件中/%d~%d件表示', $all, $start + 1, $end));
        if ($page != $maxpage && $maxpage != 0) {
            $this->set('next', '<a href="/s/search/'.$type.'/?page='.($page + 1).'&'.http_build_query($query).'">次へ</a>'."\n");
        }

        // セッション登録(検索結果戻る対策)
        $this->Session->delete('Search.back');
        $this->Session->write('Search.back.url', '/s/search/'.$type.'/?page='.($page).'&'.http_build_query($query));
        $this->Session->write('Search.back.pagename', '検索結果一覧');
    }

初めて使ったコンポーネント・プラグイン

SSL Component https://github.com/plank/secured
→メソッド単位でSSLの切り替えができるのでめっちゃ便利でした。(ちょっとだけパフォーマンス悪くなる!?)
Yalog: Yet Another Logger for CakePHP https://github.com/k1LoW/yalog
→Log4phpが簡単に使える様になります。オリジナルのログローテーションクラスもLog4phpには引けをとらないと思いました。

参考になったサイト

AutoLoginComponentを参考に自動ログイン実装しました。 http://d.hatena.ne.jp/sanojimaru/20091210/1260447577

Auth Componentを使用したかったのですが、ユーザー認証がAPI経由で行う仕様だったので非常に参考になりました。http://weble.org/2011/04/05/cakephp-oauth
CakePHPでコンポーネントのテスト

モデルを使用しないコンポーネント用のテストする方法を書きたいと思います。
CakePHPは1.3.5を使用しています。

テスト(Testing) :: CakePHPによる作業の定石 :: マニュアル :: 1.3コレクション.

simpletestインストール

マニュアルにも書いてある通りsimpletestはCakePHPに含まれないのでSimpleTest – Unit Testing for PHP.からダウンロードしてきてvendorsにフォルダをコピーしておきます。
※1.3.5ではsimpletest1.1系は動かないようだったので、1.0系をインストールしました。

モデルを使う場合はapp/config/database.phpにテスト用のデータベースの設定を書いておいた方が良いですが今回は使用しないので特に書きません。

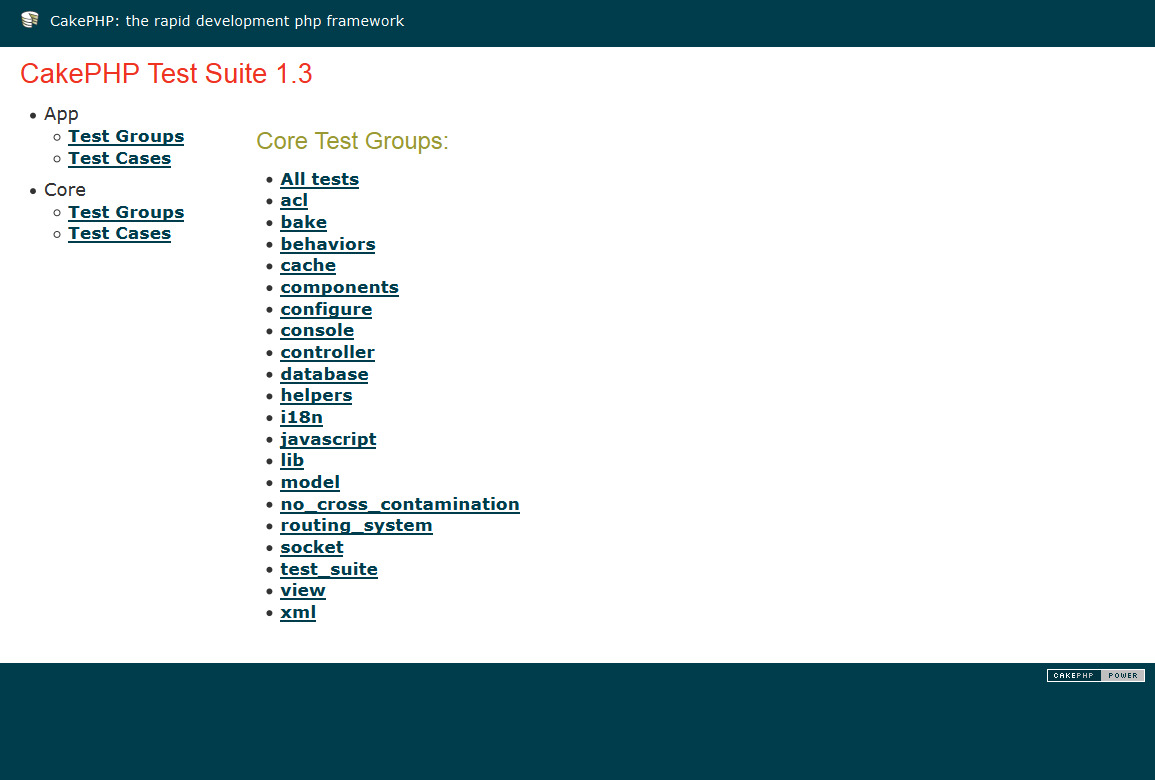
http://text.example.com/test.phpでCakePHPに組み込まれているテストケースを実行できます。
私の場合は、1つCakePHPに複数appをディレクトリ毎に分けているので以下のようにtest.phpを変更しました。

set_time_limit(0);
ini_set('display_errors', 1);
/**
 * Use the DS to separate the directories in other defines
 */
	if (!defined('DS')) {
		define('DS', DIRECTORY_SEPARATOR);
	}
/**
 * These defines should only be edited if you have cake installed in
 * a directory layout other than the way it is distributed.
 * When using custom settings be sure to use the DS and do not add a trailing DS.
 */
    if (PHP_OS == "WIN32" || PHP_OS == "WINNT") {
        define('C', 'C:');
    } else {
        define('C', '');
    }
/**
 * The full path to the directory which holds "app", WITHOUT a trailing DS.
 *
 */
	if (!defined('ROOT')) {
		//define('ROOT', dirname(dirname(dirname(__FILE__))));
		define('ROOT', C.DS.'home'.DS.'example'.DS.'cake_app');
	}
/**
 * The actual directory name for the "app".
 *
 */
	if (!defined('APP_DIR')) {
		//define('APP_DIR', basename(dirname(dirname(__FILE__))));
		define ('APP_DIR', 'user');
	}
/**
 * The absolute path to the "cake" directory, WITHOUT a trailing DS.
 *
 */
	if (!defined('CAKE_CORE_INCLUDE_PATH')) {
		//define('CAKE_CORE_INCLUDE_PATH', ROOT);
		define('CAKE_CORE_INCLUDE_PATH', C.DS.'home'.DS.'example'.DS.'cake_core');
	}

/**
 * Editing below this line should not be necessary.
 * Change at your own risk.
 *
 */
if (!defined('WEBROOT_DIR')) {
	define('WEBROOT_DIR', basename(dirname(__FILE__)));
}
if (!defined('WWW_ROOT')) {
	define('WWW_ROOT', dirname(__FILE__) . DS);
}
if (!defined('CORE_PATH')) {
	if (function_exists('ini_set') && ini_set('include_path', CAKE_CORE_INCLUDE_PATH . PATH_SEPARATOR . ROOT . DS . APP_DIR . DS . PATH_SEPARATOR . ini_get('include_path'))) {
		define('APP_PATH', null);
		define('CORE_PATH', null);
	} else {
		define('APP_PATH', ROOT . DS . APP_DIR . DS);
		define('CORE_PATH', CAKE_CORE_INCLUDE_PATH . DS);
	}
}
if (!include(CORE_PATH . 'cake' . DS . 'bootstrap.php')) {
	trigger_error("CakePHP core could not be found.  Check the value of CAKE_CORE_INCLUDE_PATH in APP/webroot/index.php.  It should point to the directory containing your " . DS . "cake core directory and your " . DS . "vendors root directory.", E_USER_ERROR);
}

$corePath = App::core('cake');
if (isset($corePath[0])) {
	define('TEST_CAKE_CORE_INCLUDE_PATH', rtrim($corePath[0], DS) . DS);
} else {
	define('TEST_CAKE_CORE_INCLUDE_PATH', CAKE_CORE_INCLUDE_PATH);
}

if (Configure::read('debug') < 1) {
	die(__('Debug setting does not allow access to this url.', true));
}

require_once CAKE_TESTS_LIB . 'cake_test_suite_dispatcher.php';

$Dispatcher = new CakeTestSuiteDispatcher();
$Dispatcher->dispatch();

コンポーネントのテスト

coupon.phpという外部APIを使用してクーポン情報を取得するコンポーネントを例にします。
appのルートディレクトリはtest.phpにある通り/home/example/cake_app/user/になります。

ディレクトリ構成は下記のような形になります。

user
│
├─controllers
│ │
│ └─components
│         coupon.php(テスト対象コンポーネント)
└─tests
  ├─cases
     │
     ├─components
          coupon.test.php(テストクラス)

クーポンコードをパラメーターにクーポン情報を取得するCouponComponent->get()が有る場合に正しく取得できたかどうかのテストケースは以下のようになります。

<?php
App::import('Component', 'Coupon');

class CouponComponentTestCase extends CakeTestCase {
    function setUp () {
        $this->component = new CouponComponent();
    }

    function test_get () {
        $result = $this->component->get(array('coupon_code' => 'xxxx'));

        $xml = new Xml($result);
        $data = Set::reverse($xml);

        $this->assertEqual('success', $data['Result']['mstatus']);
    }

}

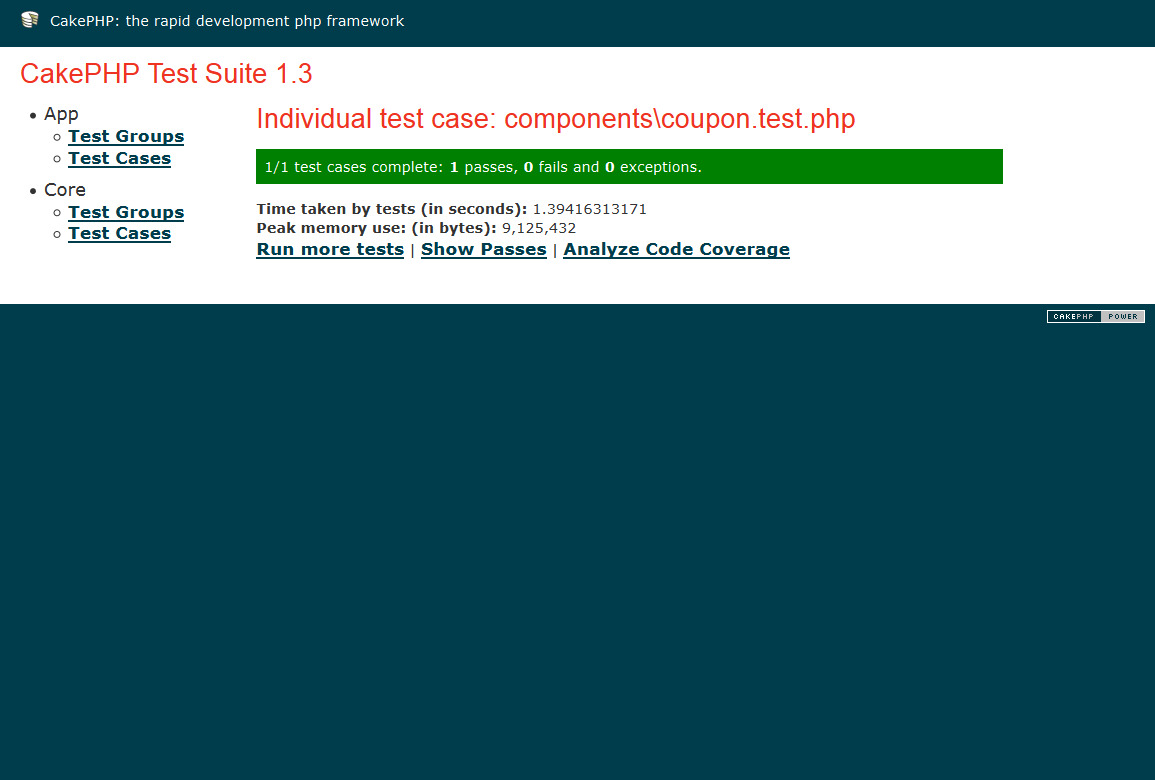
test.phpから実行確認も可能ですし、コンソールからも実行確認可能です。

CakePHPでHABTMのデータのチェックボックスを作る

前提

前提として以下のような場合のテーブルでHABTMの設定をしているとします。

テーブルのリレーション

モデル

good.php

<?php
class Good extends AppModel {
    var $name = 'Good';
    var $hasAndBelongsToMany = array(
        'Tag' => array(
            'className'             => 'Tag',
            'joinTable'             => 'goods_has_tags',
            'with'                  => 'GoodsHasTag',
            'foreignKey'            => 'good_id',
            'associationForeignKey' => 'tag_id',
            'conditions'            => array(
                'Tag.deleted' => null,
            ),
            'unique'                => true,
        )
    );

    var $validate = array(
        'id'          => array('notempty'),
    );

}
?>

tag.php

<?php
class Tag extends AppModel {
    var $name = 'Tag';
    var $hasAndBelongsToMany = array(
        'Good' => array(
            'className'             => 'Good',
            'joinTable'             => 'goods_has_tags',
            'with'                  => 'GoodsHasTag',
            'foreignKey'            => 'tag_id',
            'associationForeignKey' => 'good_id',
            'conditions'            => array(
                'Good.deleted' => null,
            ),
            'unique'                => true,
        )
    );
    var $hasMany = array(
        'GoodsHasTag' => array(
            'className'  => 'GoodsHasTag',
            'foreignKey' => 'tag_id',
        )
    );

    var $validate = array(
        'id' => array('notempty'),
    );

}
?>

goods_has_tag.php

<?php
class GoodsHasTag extends AppModel {

    var $name = 'GoodsHasTag';

    var $belongsTo = array(
        'Good'           => array(
            'className'  => 'Good',
            'foreignKey' => 'good_id',
            'conditions'            => array(
                'Good.deleted' => null,
            ),
            'unique'                => true,
            'fields'     => '',
            'order'      => ''
        ),
        'Tag' => array(
            'className'  => 'Tag',
            'foreignKey' => 'tag_id',
            'conditions'            => array(
                'tag.deleted' => null,
            ),
            'unique'                => true,
            'fields'     => '',
            'order'      => ''
        )
    );

}
?>

※deletedは削除用フラグ

チェックボックス作成用のソースコード

コントローラー

function add(){
        $this->set('tags', $this->Good->Tag->find('list', array(
            'conditions' => array(
                'Tag.deleted' => null,
            ))));
    ...
}

ビュー

<?php
echo $form->input('Tag',array('multiple'=>'checkbox', 'label' => 'タグ'));
?>

このように書いておけば、例えば更新画面の場合は$this->dataに入ってるデータをデフォルトでチェックつけた状態で表示されますし。登録の際に$this->Good->saveAll($this->data);とすればgoods_has_tagsテーブルも更新されます。(更新の場合はDELETE、INSERTされます)

個人的にはHABTMでデータ持つのは面倒な気がしていてあまり好きじゃないので、多対多の場合はカンマ区切りで文字列でデータを持たせるように作ってます。
(goodsの場合だと、goods.tagのようなフィールドを作って文字列で)

文字列で持たせる場合も、以下のコードでチェックボックスを作成できます。

<?php
echo $form->input('tag', array('type' => 'select', 'multiple' => 'checkbox', 'options' => Invariable::$TAG_TYPES, 'value' => explode(',', $this->data['Good']['tag']), 'label' => 'タグ'));
?>

※タグは定数Invariable::$TAG_TYPESで管理。

CakePHPでページの違う画面の内部リンクを有効にしたい場合

二通りやり方があって、一つは.htaccessでURLの#以降もCakePHPに制御させない方法と、javascriptで対応する方法。

今回はjavascript(jQuery)で対応してみました。

javascriptで実現する方法

遷移先のVIEWに下記を記述するだけです。

<script type="text/javascript">
$(document).ready(function () {
    if (location.hash) {
        y = $("*[name="+location.hash.slice(1)+"]").offset().top;
        scrollTo(0,y);
    }
})
</script>

location.hashで#xxパラメーターを取得して、それを使ってname属性でフィルターしたオブジェクトのoffsetを取得します。
あとは、そこまでスクロースする処理を行えば疑似的に内部リンクが有効になります。

.htaccessで実現する方法

.htaccessに下記を記述すると実現できるようです。(未検証)

<IfModule mod_rewrite.c>
    RewriteEngine On
    RewriteCond %{REQUEST_FILENAME} !-d
    RewriteCond %{REQUEST_FILENAME} !-f
    RewriteRule ^(.*)(#*.*)$ index.php?url=$1$2 [QSA,L]
</IfModule>

CakePHP で RSS 取得して表示する

CakePHPでRSS取得する方法。

すげー簡単です^^

例としてlivedoor newsのトピックスを取ってきたい場合

コントローラーで

    function index () {
        uses('Xml');
        $xml = new Xml('http://news.livedoor.com/topics/rss.xml');
        $rss = Set::reverse($xml);

        return $rss['Rss']['Channel']['Item'];
    }

と書くだけ。$rssには取得したxmlが配列形式で格納されます。

requestActionから利用するときは

        if (empty($this->params['requested'])) {
            $this->cakeError('error404');
        }

と書いといて、requestActionからのみアクセスできるようにしておきます。

ビューからは

        <?php $index = $this->requestAction('/rsses/index/'); ?>
        <?php if ($index) : ?>
          <ul>
          <?php foreach($index as $item) : ?>
            <li><a href="<?php echo $item['link']; ?>" target="_blank"><?php echo $item['title']?></a></li>
          <?php endforeach; ?>
          </ul>
        <?php endif; ?>

このような感じで取ってきたRSSを表示すれば、簡単にサイトにlivedoor newsが表示できます。

CakePHPでktai libraryを使う

構成

いつもの通りバーチャルホストでテスト。

hosts

127.0.0.1       test.sample.com

vhost

#test.sample.com
<VirtualHost *:80>
    DocumentRoot "/home/sample/public_html"
    ServerName test.sample.com
    <Directory "/home/sample/public_html">
        AllowOverride All
        order deny,allow
        allow from All
    </Directory>
</VirtualHost>

ディレクトリ

http://sample.com/ ← ユーザー
http://sample.com/admin ← 管理画面
http://sample.com/mobile ← モバイル
と分けたい。

/home/sample/
		cake_core ← [vendors、cake、plugins]
		public_html ← [appのwebrootをコピー]
		cake_app ← [appをコピーしてuser,admin,mobileにリネーム]

index.phpの変更

public_html/index.php

/**
 * These defines should only be edited if you have cake installed in
 * a directory layout other than the way it is distributed.
 * When using custom settings be sure to use the DS and do not add a trailing DS.
 */
    if (PHP_OS == "WIN32" || PHP_OS == "WINNT") {
        define('C', 'C:');
    } else {
        define('C', '');
    }
/**
 * The full path to the directory which holds "app", WITHOUT a trailing DS.
 *
 */
	if (!defined('ROOT')) {
		//define('ROOT', dirname(dirname(dirname(__FILE__))));
		define('ROOT', C.DS.'home'.DS.'sample'.DS.'cake_app');
	}
/**
 * The actual directory name for the "app".
 *
 */
	if (!defined('APP_DIR')) {
		//define('APP_DIR', basename(dirname(dirname(__FILE__))));
		define ('APP_DIR', 'user');
	}
/**
 * The absolute path to the "cake" directory, WITHOUT a trailing DS.
 *
 */
	if (!defined('CAKE_CORE_INCLUDE_PATH')) {
		//define('CAKE_CORE_INCLUDE_PATH', ROOT);
		define('CAKE_CORE_INCLUDE_PATH', C.DS.'home'.DS.'sample'.DS.'cake_core');
	}

public_html/mobile/index.phpは[APP_DIR]を’mobile’に変更

Ktai Libraryをコピー

githubからパッケージをダウンロードしてappディレクトリをmobileにコピー。
Ktai Library本体をmobile/vendorsにコピー。

routes.php

Router::connectNamed(array(), array('argSeparator' => '~'));

ktai_app_controller.php

ktai_app_controller.phpをapp_controller.phpにリネームする。

$ktaiプロパティの追加

今回は各コントローラーに追加。
ソースファイルは全て、UTF-8で作成しcharset=Shift-JISとして出力とした。

    var $ktai = array(
        'input_encoding'            => 'UTF-8',
        'output_encoding'           => 'SJIS-win',
        'use_binary_emoji'          => true,
        'output_auto_convert_emoji' => true,
        'output_auto_encoding'      => true,
        //'output_convert_kana'       => 'knrs',
        'output_convert_kana'       => 's',
        //'use_xml'                   => true,
    );

shift-jisでデータがサブミットされるので、

    function beforeFilter () {
        parent::beforeFilter();
        mb_convert_variables("UTF-8", "SJIS-Win", $this->data);
    }

とした。

また、フォームの「accept-charset」はApp.encodingの値が設定されるので

<?php echo $this->Form->create('Regist', array('encoding' => 'shift-jis'));?>

とする。

最後に

app_error.phpでエラー処理しているのですが、Ktaiコンポーネントのshutdownメソッドが呼ばれずshift-jisで出力できないので、エラーページだけshift-jisで対応しました。

CakePHP Authコンポーネントでユーザー情報とセッションの更新

ログインの処理はAuthコンポーネントを使用する事が多いと思います。
Authコンポーネントを使用すると、ユーザー情報はセッションに保存されますが、認証に使うテーブル(デフォルトUsers)を更新した場合は保存されているセッションは更新されないので以下のようにします。

$this->User->save($data);
$this->Auth->login($this->Auth->user('id'));

こうすると、セッションも更新されます。

http://api13.cakephp.org/class/auth-component#method-AuthComponentlogin

CakePHPのSecurity.levelまとめ

まずは、Security.levelについて

Security.level session.cookie_lifetime(セッションクッキーの有効期間) session.referer_check SESSION IS
high 0(ブラウザを閉じるまで) $_SERVER[“HTTP_HOST”]; リクエストごとに作成される
medium 7日間 $_SERVER[“HTTP_HOST”];
low 25年間 なし

session.cookie_lifetimeはセッションクッキーの有効期間なので、セッションタイムアウトは別に[core.php]の

/**
 * 'high'	Session timeout in 'Session.timeout' x 10
 * 'medium'	Session timeout in 'Session.timeout' x 100
 * 'low'		Session timeout in 'Session.timeout' x 300
 */
Configure::write('Session.timeout', '120');

で指定する。(Security.levelの設定によって変わる)

また、session.cookie_lifetimeの値はCakePHP 1.3 のもので、1.3.5だと

if ($this->security == 'high') {
	$this->cookieLifeTime = 0;
} else {
	$this->cookieLifeTime = Configure::read('Session.timeout') * (Security::inactiveMins() * 60);
}

Security::inactiveMins()は

function inactiveMins() {
	switch (Configure::read('Security.level')) {
		case 'high':
			return 10;
		break;
		case 'medium':
			return 100;
		break;
		case 'low':
		default:
			return 300;
			break;
	}
}

なので、Session.timeoutに依存する。(デフォルトは120m)

session.referer_checkとは

session.referer_check には、HTTP Referer に おいて確認を行う文字列を指定します。Refererがクライアントにより 送信されており、かつ、指定した文字列が見付からない場合、埋め込 まれたセッションIDは無効となります。デフォルトは空の文字列です。 

セッションハイジャックとかを防止するためには必要だと思う。

どうしたいか

  • ブラウザ閉じたらセッションは削除したい(自動ログインの機能は別途作成)
  • session.referer_checkできれば有効にする

ブラウザ閉じたらセッションは削除したい(自動ログインの機能は別途作成)

Security.level = ‘high’ だと リクエストごとにSESSION ID が作られるので、それだと携帯サイトの場合、都合が悪い、SESSION IDはそのままで、ブラウザ閉じたらセッションは削除したい。

/app/config/my_session.phpという設定ファイルを作成し、[core.php]に設定する。

Configure::write('Session.save', 'my_session');

my_session.phpは[cake_session.php]のcase ‘cake’:をコピーして

if (empty($_SESSION)) {
	if ($iniSet) {
		ini_set('session.use_trans_sid', 0);
		ini_set('url_rewriter.tags', '');
		ini_set('session.serialize_handler', 'php');
		ini_set('session.use_cookies', 1);
		ini_set('session.name', Configure::read('Session.cookie'));
		//ini_set('session.cookie_lifetime', $this->cookieLifeTime);
		ini_set('session.cookie_lifetime', 0); // 変更
		ini_set('session.cookie_path', $this->path);
		ini_set('session.auto_start', 0);
		ini_set('session.save_path', TMP . 'sessions');
	}
}

session.cookie_lifetimeを’0’にして、ブラウザが閉じたらセッションを削除するようにする。

session.referer_checkできれば有効にする

Security.level は ’high’ or ‘medium’ にする。
このチェックに引っ掛かるとセッションが消えてしまうので、WEBサービス何かと連携する時は’low’にした方が無難。
※proxyを使っててもリファラーチェックに引っ掛かる事が有った。

ただ、セッションが切れないように作り方を変えれば良い場合も有るので、なるべくそっちで対応した方が良い。

最後に

今回は
仮登録メール⇒メールに記載のURLクリック⇒(内部でリダイレクトして)プロフィールフォーム⇒登録完了
という機能を作成していて、開発時のメールサーバーはRadishを使っていたので、問題無かったが本番にリリースした際(yahooメール等)、セッションが切れて登録出来ないという不具合が起きてしまった。
その為、リダイレクトの必要は特に無かったので、リダイレクトをしないようにして事なきを得た。
しかし、本番でもテストはしていたのだが、リリースしたのが結構前だった為、この現象が起きたかどうか覚えていない。
※普通にURLをコピーしてアドレスバーに貼り付けてテストしたのかも・・・

色々ありましたが、勉強になりました。